
Elluminate Plan
 Elluminate Plan is a standalone desktop application that allows preparing the contents of an Elluminate session beforehand and then automate actions in one session. This tool is aimed at tutors, course designers or anyone who wants to organize the activities of a presentation in advance. This session prepared can be used to teach a class or to create a learning object that can be added to a course.
Elluminate Plan operates independently of Elluminate Live and allows the creation of sessions on a computer without internet. Once you have completed the creation of the session, you can proceed to load the Elluminate Live session. The fact that automate many tasks involved in conducting a meeting, presenters can focus on explaining the material and interact with participants of the meeting. In addition to this, this tool provides course designers ensuring that course content will be presented in a consistent way by different presenters. If you are interested in using this tool, you can download the trial version through this link, which will be active for a period of 30 days. Teachers of courses in the Virtual Classroom interested in using this tool, please contact the coordination of their respective course to receive an account to use it.
User Interface
The editor Plan consists of four elements:
1. The toolbar
2. The list of uploaded files
3. The outline of the Plan
4. The properties panel

Basic steps to create a Plan
| 1. Upload files to the library and edit their properties. |

|
The files that will be used during the Elluminate session should be charged to the session. This is done using the icon shown.
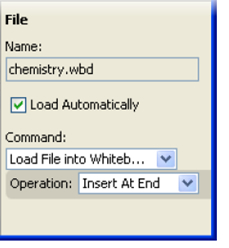
For each file uploaded, the file properties window should be edited. In this window if you want to edit the file is loaded in the session or on the board and whether the file is loaded automatically. The automatic loading of the file is the default option and allows you to upload the file to load when the session plan. |
| 2. Move content to the layout plan |
Once the files have been loaded, they must be dragged to the bottom of the screen showing the outline of the Elluminate session.
Subsequently, these files can be reordered by using the mouse or arrow keys found on the toolbars. The files must be placed in the order you want them to be deployed. |
|
| 3. Organize content using topics and subtopics |

|
Once you have uploaded files in the program and organized sequentially in the section of 'scheme', you must organize the content using topic and subtopic. To create a topic, use the button shown.
To create a subtopic, you must first create the topic as such, then select the text with your mouse and then click on the arrow button |
| 4. Add the contents of the scheme |
 |
Once you have the outline of the session organized can add actions to be undertaken in the session with the button shown.
Among the options available are: Elluminate recording session, load a media file, make a presentation, go to a website, desktop sharing, conducting a survey and upload a file to the board. |
| 5. Add text notes |
 |
You can add text notes to supplement the content of the session. This text will be visible by anyone with permissions to see the outline of the session. To add text notes must click on the button shown.
Once you have finished preparing the Elluminate session, you must save the same: "Files"> "Save as ". The file extension must be created elpx. |

Links
Back to Tools